Saturday, October 26, 2013

The 8x10 photo dilemma

Hello friends!

I found this picture of Nick from a couple of years ago.  It's a funny thing when you clean & organize, the things you can find!  :)  So I set about making a layout from this wonderful picture (photo credit:  Daniel Ruelas Photography).  The only trouble is how difficult it is to embellish a 12x12 piece of paper with an 8x10 photograph on it!  This picture in particular, as zoomed in as it is with my baby's huge noggin taking up a good amount of the photo, I felt it necessary to balance out the weight with lots of embellies on the opposite corner of that gorgeous curly little head. 


The funny thing is I only wanted the brown satin ribbon, cream banner, and red chipboard.  I added the buttons and everything else later because it still seemed top-heavy.  Stamps are CTMH, buttons are Studio Calico, ribbon is SU!, and transparent embellies are Making Memories. 
 
Any other tips or tricks on embellishing pages with large photos?  Share them here so I can try them out next time!
 
Thanks for stopping by and leaving love!
 
Blessings,
Martha

Thursday, October 24, 2013

LO share

I don't know about you guys, but I am card-ed out!  After spending about 10 days making nothing but cards, going back to regular scrapbooking was a welcome relief.  Here are my creations.
 
(CTMH Later Sk8r paper and embellies, and alpha stamp set)
 
 
(CTMH ProPlayer paper, embellies, and stamps)
 
 
(Fancy pants paper, MS circle punch, all else from stash)
 
 
(Fancy Pants PP, CTMH stamp ("just hanging out"))
 
(October Afternoon paper and sticker, letter stickers are Little Yellow Bicycle, and I even sewed around the perimeter of my page!).
 
Thanks for stopping by and leaving love!
 
Blessings,
Martha
 

Tuesday, October 22, 2013

Artbooking Made Easy: Fall into Artbooking (S01E07)

If there is only one of the CTMH Artbooking videos you'll watch, choose this one. It is *awesome*. Of course, I'm biased because I love Autumn and Autumn colors! The LOs are fabulous, though.

 Enjoy!
Blessings, Martha

Monday, October 21, 2013

Christmas cards, part 2

Hello crafty friends,

Here is my next installment of Christmas card inspiration!

This first one is a 5x7 card.  I tend to make the A2 size cards so this card is much bigger than what I prefer to work with.  The background paper is an old Basic Grey, the shiny red is Bazzill that I ran through the Big Shot machine with an SU! die, and the wreath is cut from Cricut's Anna Griffin Winter Wonderland cartridge.  I added hot fix stones in gold, after spraying the wreath with Glimmer Mist.  The banner is cut from the AG cartridge, too, and the "Merry Christmas" is from an older CTMH set. 


This next one came together nicely.  I was searching for some CTMH cardstock when I stumbled upon a package of vellum paper and boy was that a nice surprise!  I am loving running the vellum through my Cuttlebug!  This Christmas tree folder is an Anna Griffin folder purchased through HSN.  The cream-colored banner is plain cardstock that I stamped with a CTMH background stamp and from that same set of stamps, I used a chevron background to stamp  green CTMH cardstock which I then punched with an SU! ornament punch.  The round "Merry Christmas" is from a new set of CTMH stamps that will be available for purchase on October 15th.  Twine is CTMH also. 


Some of the elements are on pop dots for that wonderful 3D effect.


This next one is actually the very first Christmas card I made this year.  It's fairly plain... I ran green cardstock through the Cuttlebug with another Anna Griffin folder, ran red cardstock through the coordinating smaller folder, used the CTMH set called Holiday Tags (available for purchase HERE), and added an old bow from my stash.  I also sprayed Glimmer Mist on both the green and red pieces. 


This next card was inspired by the CTMH art using this stamp set from last year.  I copied the CTMH idea almost exactly, using the Art Philosophy Cricut cartridge that coordinates with the stamps.


Instead of stamping those tiny birds in Ruby and cutting them out-- I'm not into fussy cutting!-- I just used red Stickles to accent the birds on the stamped image. And if you look at the Ruby cardstock beneath the tree you can sort of tell that I ran that through a Cuttlebug folder for texture.  Red satin SU! ribbon completes the card. 


That's all I have for now, my friends.  Stay tuned for a few more Christmas card creations, and on October 15th I will be participating in a CTMH Blog Hop that showcases all the new stamps from the Holiday Mini catalog.  Don't have a catalog?  Leave a comment below or email me and I will get one to you.  Then check back on the 15th to see the cards I've made with a couple of stamp sets from that catalog.  Until then, stay crafty my friends!  ;) 
 
Blessings,
Martha

Saturday, October 19, 2013

Gratitude Journal 2013

Hello crafty friends!

I've been watching Ali Edwards make a December daily year after year after year and I totally want to do it, too.  But the kit costs $99... and I'm too lazy to make my own (LOL)... and I've heard of people doing November gratitude journals so I decided that was better suited to my needs and budget at this time.  ;-)

Last week I got to work on making my journal.  I have this package of chipboard from Hobby Lobby.  I think I paid $6 for it.  I decided to cut each sheet of chipboard in half, making my book-making process easier.  Also, each page will have a 4x6 picture (or smaller) and journaling, and of course I need space for embellishing, too!  :D  Making each page 5.5 x 8.5 is perfect to accommodate all of that. 


I picked these patterned paper packs to decorate my album.  On the far left is the CTMH Huntington paper pack (available now), n the middle is last year's Avonlea CTMH paper, and a My Mind's Eye paper pad that my dear sister Ana bought me at Michael's.  :-)


Further, I've picked out stickers and other embellishments that I will include in my album.  These are all being put into a box for when the time comes...


This is the cover of my album.  I used Huntington paper, cardstock cut with CTMH's Art Philosophy Cricut cartridge, and the pumpkin, cut with CTMH cardstock, was actually cut from one of the Disney princess cartridges.  I added Stickles, and CTMH mocha pearls and bling, as well as bronze Shimmer Trim.  The "so very" and "2013" are from a CTMH alphabet stamp set.  The leaves are cut from the Art Philosophy cartridge, too, using CTMH bronze glitter paper. 


Details:


Some of the inside pages:


Now, why did I make this again?  What is a gratitude journal?  Well, every day for the month of November I will take one picture of someone or something I am grateful for and then journal about that, making one page per day.  I will print the pictures until the end of the month (unless there's a sale on picture printing!) but I can plan each page accordingly, adding the journaling and embellishments each day as I go along. ;-) As I go through, I'll dig through my box of pre-picked embellishments, stickers, etc, to spruce each page up.  Also, I will print my pictures in black and white just so that there aren't conflicting colors in my journal.  The Autumn palette is my very favorite set of colors so I want to stay true to that. 
 
Does anybody want to join me?  You need to make your journal now so that you can hit the ground running on November 1st... and if you'd like me to make your gratitude journal, contact me for more information.  ;-) 
 
I will be sharing my finished pages throughout the month of November so stay tuned!
 
Blessings,
 
Martha
 

Friday, October 18, 2013

October Stamp of the Month

It isn't just for Christmas! 

This is the October Stamp of the Month (SOTM):

 
You can purchase this set for $17.95 OR if you place an order for $50 then you can buy it for just $5!
 
The red shapes around some of the images means you can cut the image with your Art Philosophy Cricut cartridge.  I posted one card that I made with this stamp set just yesterday, but here are two more that I've made.  One is Christmas and the other not so much! 
 
I used Olive and Cranberry cardstock, as well as some Crème Brulee.  I stamped the entire house image onto Olive and Cranberry carstock, not just the Bamboo, so that I could cut out the tree and heart, respectively.  The card base is also cut with the Art Philosophy cartridge.  See how it has that fancy edge?  I love that!


This next card is more Valentine's day / love note.  The shaped card is cut with the Artiste cartridge.  I added "love" stamped multiple times with Cranberry ink, Cranberry twine, and there's some red Shimmer Trim.  After I cut out the heart shape that I was going to stamp on, I also cut two more hearts a bit smaller.  On one of them I added red Glitter Gel.  It looks bronze in the picture because of the angle, but I promise it's red! 


Interested in purchasing any of the products I used to make these cards?  Click on the "Shop with Me" picture on the top right column, or contact me to discuss either placing an order or hosting your own party for rewards/freebies. 

Thank you for stopping by and leaving love!

Blessings,

Martha

Thursday, October 17, 2013

Part 3 of the Holidays from the Heart Blog Hop!


Yes, I have a few more cards to share!  Continuing with yesterday's post with the Mary and Babe stamp set (available HERE).  I used Topiary and Cranberry cardstock and ink for this, and the faux stitching is with Saddle ink (from an older stamp set).  The "love" and other words at the bottom of the card come from the October Stamp of the Month called Scandinavian Wishes (available HERE).


Next,, I kept it simple once again.  I just love stamping the image of Mary and her baby.  :-)  I used both red and silver Shimmer Trims (those bad boys are self-adhesive-- I love that!).  I used Topiary and Cranberry cardstock, as well as white (which I inked up with Bamboo, one of my very favorite things to do).  Some twine in cranberry and bling finishes the card off.


Because the Topiary cardstock is so very dark, I added more champagne cardstock on the inside, and used stamped that, too.


Finally, I played with the October Stamp of the Month, since it was already out. This is what the stamp set looks like:
 
 
When I went to cut the ornament shape from the Art Philosophy cartridge, I noticed there was a decorative layer that could be cut, so I did just that with Topiary cardstock. 


Here's how I fixed it up.  I placed the green shape (cut at 5") onto champagne cardstock (cut at 5x10"), then cranberry around the frame, and I did some faux stitching on that, then added twine around the ornament part, stamped the ornament on champagne cardstock with Cranberry ink.  "Happy Holidays" in stamped in Topiary. 


And that's all for today's share!  Check out the other blogs linked up below to continue on our blog hop party.  Check back from now until the 20th as entries are added daily! 
 
As always, thank you for stopping by and leaving love!
 
Blessings, Martha


***This blog hop is open for members of the CTMH Blog Boosters. Please do not enter if you are not a member of the group.

Wednesday, October 16, 2013

Part 2 of the Holidays from the Heart BLOG HOP!

I have a couple more cards to share!  I just got the Mary and Babe stamp set (available HERE) yesterday and I promptly got to work with it!

The background Barn Red cardstock was stamped with a background stamp, Universal Backgrounds (HERE).  I used the one on the bottom left.  Next, I shaded white cardstock with Bamboo ink, then stamped the image and sentiment, adding Olive mats, twine, and some bling. 

 
The inside of the card has this: 


The next card is using the stamp of baby Jesus...  I followed the example in the mini catalog, but I haven't received the Sparkle & Shine patterned paper or the washi tape, so I had to improvise.  I took a background stamp (from the same set I mentioned above) and took Juniper ink onto Juniper cardstock.  Instead of washi tape I just used the silver Shimmer Trim.  Finally, I used alcohol markers to color in the stamped image.


Below, check out the linky blog hop party as consultants continue to add their magnificent art work using the new items from the Holiday Gift Guide!
 
THANK YOU for stopping by and for LEAVING LOVE!  :-)
 
 
***This blog hop is open for members of the CTMH Blog Boosters. Please do not enter if you are not a member of the group.

Tuesday, October 15, 2013

CTMH Holidays from the Heart Blog Hop!

Hello there! Today the Close To My Heart mini holiday catalog goes LIVE!  Yes, you can now order anything your heart desires from that wonderful little catalog. 

To celebrate the catalog release, a few of us consultants have gotten together and made samples for you all to enjoy.  At the bottom of this blog post you'll see the links to everyone else's blogs.  Cruise through to find inspiration from a very talented group of ladies! 


Have you seen the catalog?  There is a gorgeous set of paper and, of course, lovely stamp sets to go along with it.  I got busy creating with two of the stamp sets from the mini catalog, one called Santa Claus and the other called Magical Days.

For my first card, I stamped white cardstock with Bamboo ink... I wanted a background but I just couldn't bring myself to place each stamp onto a block and try to position it perfectly...sometimes I'm lazy LOL... so I stamped directly from the sheet where the stamps are stored. 
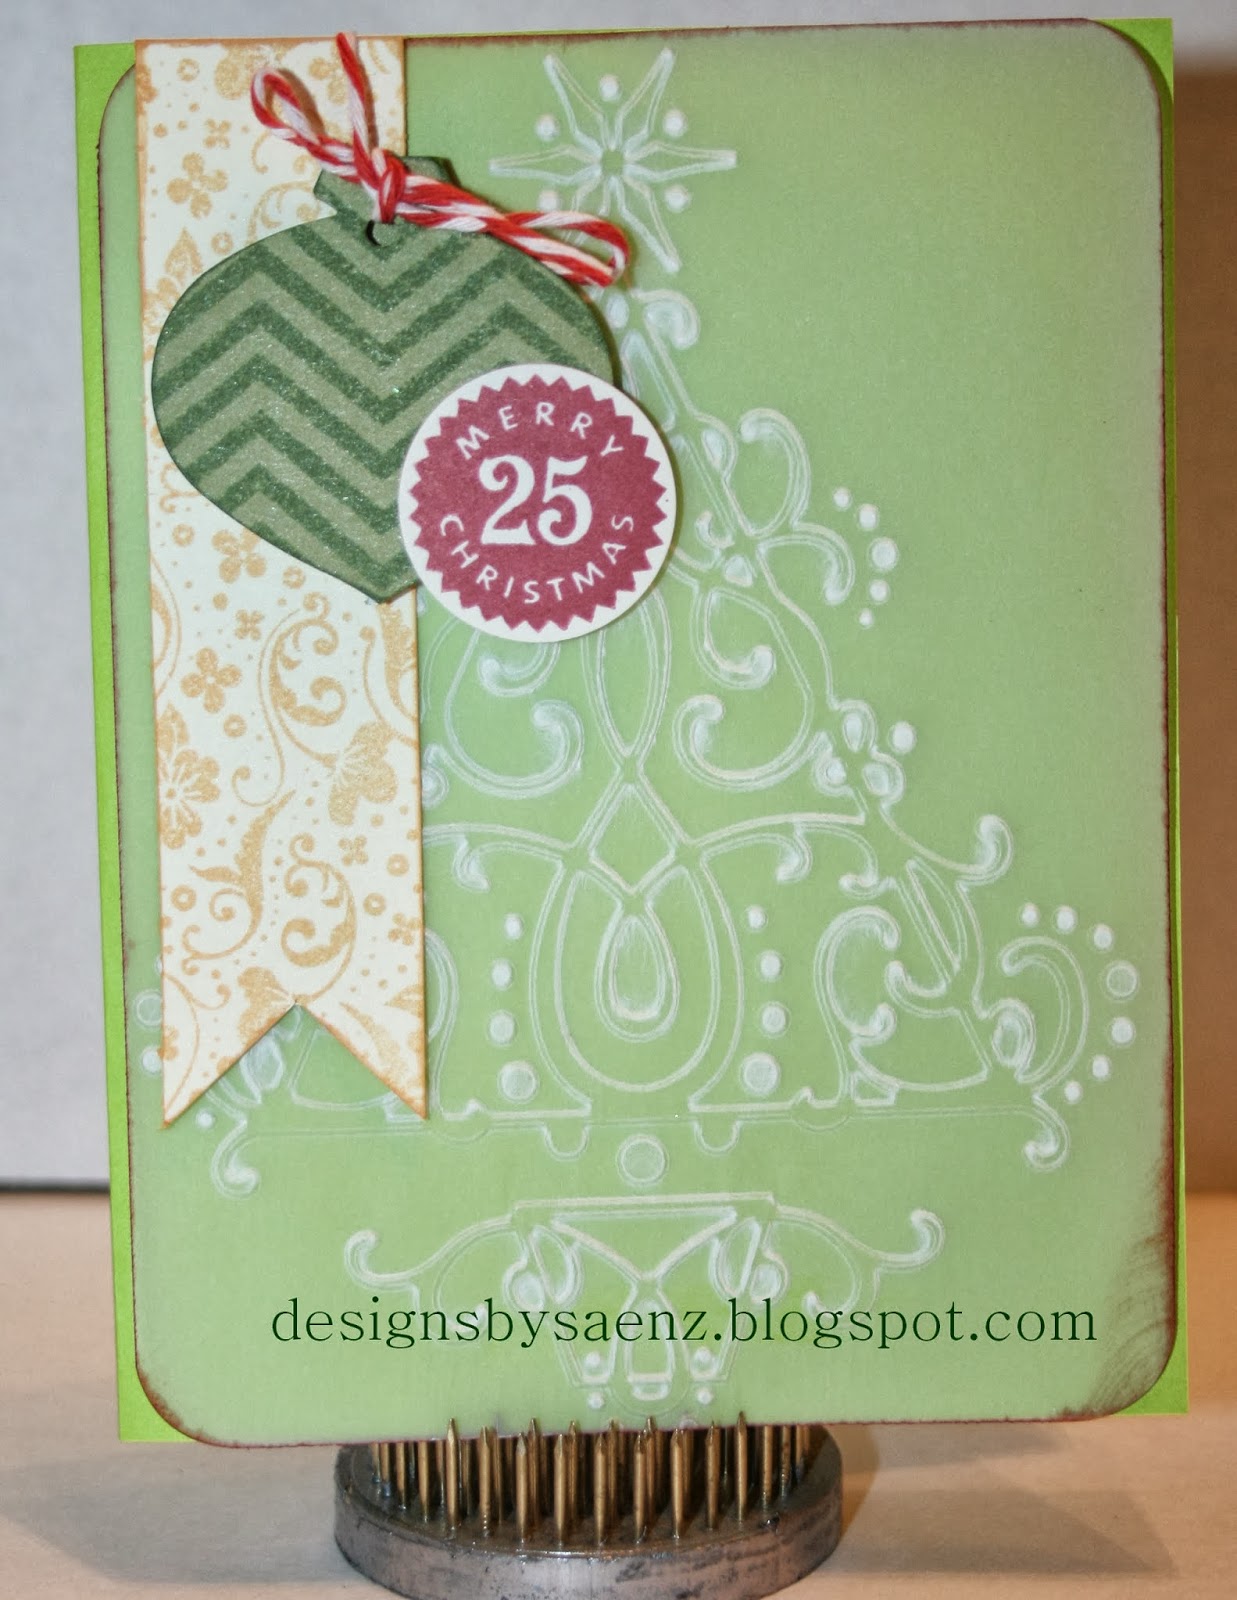


 VOILA:

 
I don't recommend doing this often; it worked because I wanted a subtle background
and not perfectly clear, even  images.  Next, I cut out a scallop circle from the Art Philosophy cartridge, onto which I stamped Santa in Ruby.  I used the Artbooking cartridge to cut the shape where I stamped the "Merry Christmas" sentiment, which I stamped with VersaMark and embossed with black.  The other two circle elements are stamped on champagne cardstock and punched out with a basic 1" circle punch.  Those are green stickles on the Santa scallop shape, and I did round the corners of my card base, as well as ink the edges with Ruby.


 A couple of the elements are on pop dots for added dimension.
 

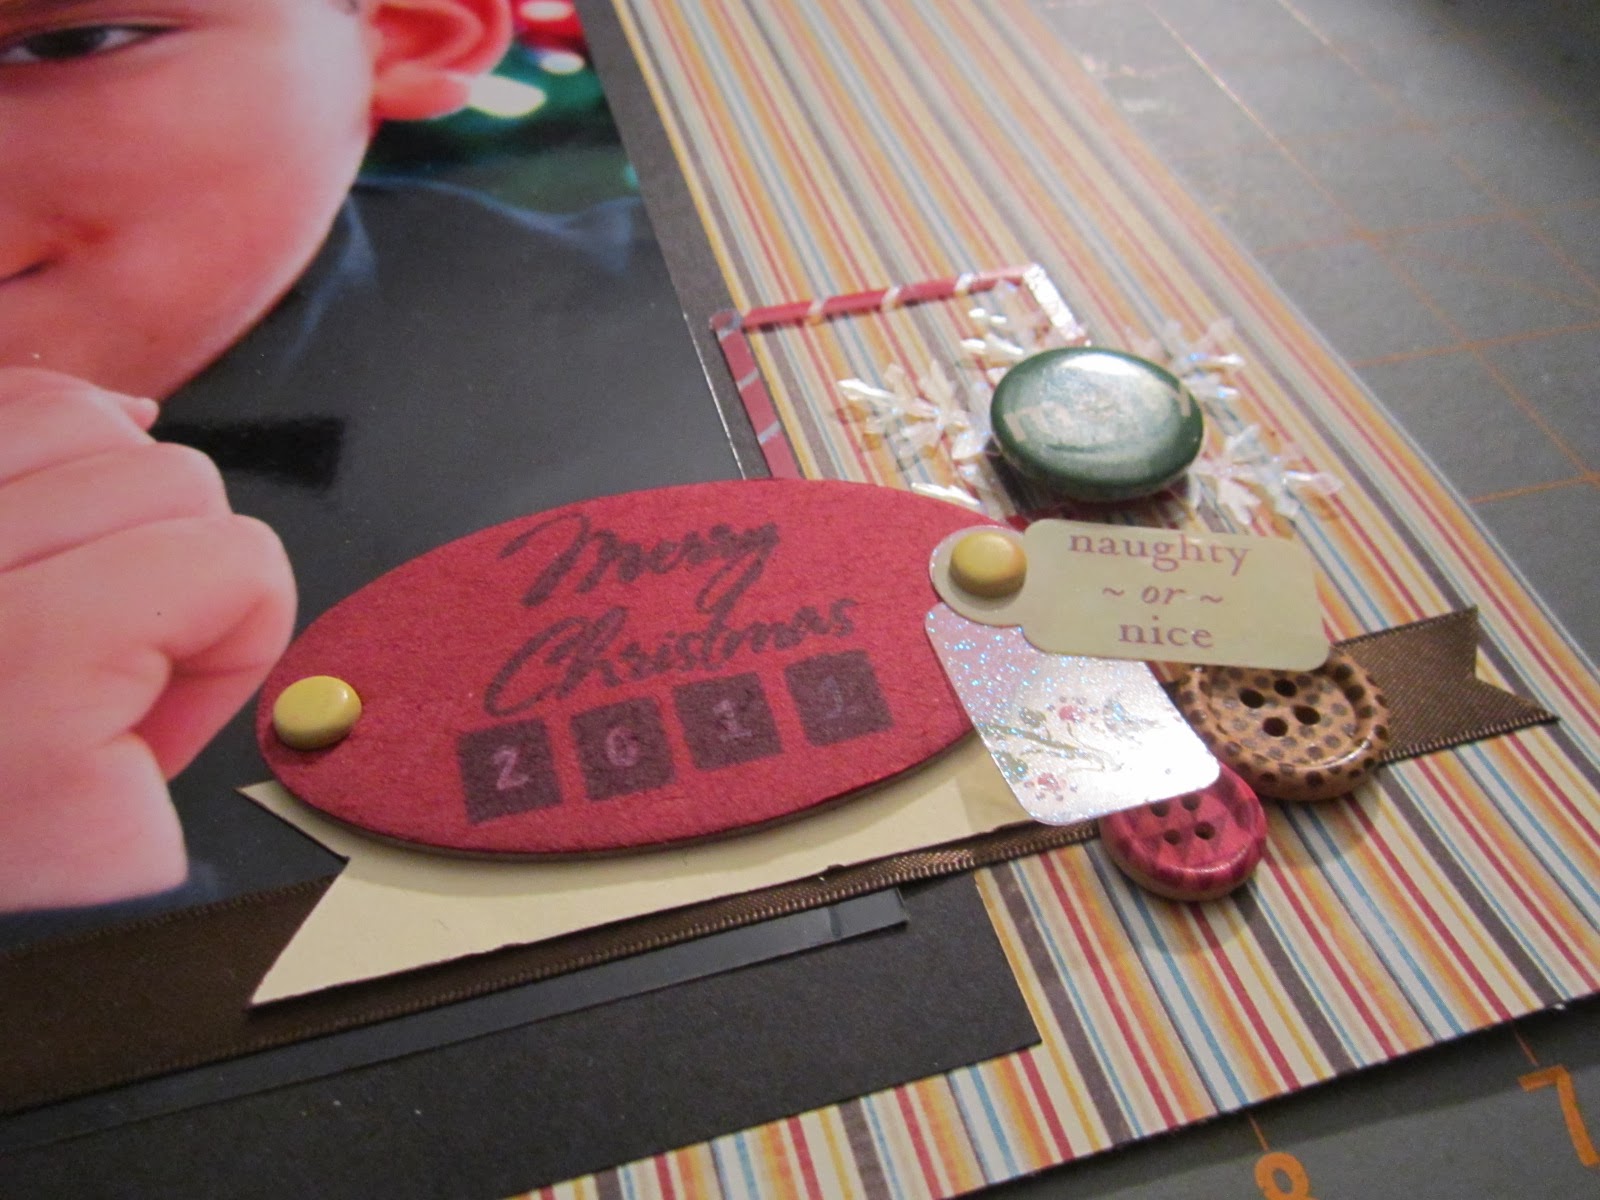
Next, I took the Santa Claus set and started stamping.  :)  First, I got a sheet of regular cardstock and stamped a background using the snowflake stamps and the "ho ho ho" greeting.  This is with Bamboo ink.  This will be cut up and used as my card base.


Next, I cut up more of the same cardstock (unstamped) to accommodate the Santa Claus stamps.  I do this as an assembly line production...


I used SU! oval punches to use beneath the stamp "Santa Claus" stamp, but of course you can use your Cricut and Art Philosophy cartridge.


I mounted everything onto Ruby cardstock, and the largest oval is Topiary cardstock.


My finished card, with green Stickles on the greeting, and there are pop dots between the ovals.  I also used the border stamp along the bottom edge of my card, which is Topiary cardstock:


Supplies used:
Santa Claus stamp set (HERE)
Magical Days stamp set (HERE)
Topiary cardstock (HERE)
Ruby cardstock (HERE)
Bamboo cardstock (HERE)
Bamboo ink (HERE)
Black ink (HERE)
Ruby ink (HERE)
Art Philosophy cartridge (HERE)
Artbooking cartridge (HERE)
 
Thank you for joining me on this blog hop!  Thanks for leaving love, too. ;-) 
 
Check out more wonderful, original, and unique artwork at the links below.


Blessings, Martha