Showing posts with label Darice. Show all posts

Monday, September 2, 2013

Working with watercolors (by me)

LOL-- I say working with watercolors "by me" in my title because this layout is a complete, total, 100% scraplift from my friend Valerie.  Here's a link to her blog with the layout I copied errr was inspired by:  Valerie B's BLOG!

First, I had to make the oval paper on my Gypsy for cutting on my Cricut: 


(I'm saving all of those ovals for later....)

I didn't have watercolor paints when I first set out to copy Valerie's layout so I used water color pencils and some shimmery chalks (Pebbles Inc brand).

 
Here's what it looked like when done. You can tell by the pencil/coloring marks which ovals are colored in with the pencils and the other ones without those lines were shaded in with chalks. 
 

Then I got me some watercolors.  :)  I cut the ovals out once again so I could compare the two different mediums side by side. 


On the left is watercolor pencils and shimmer chalks, on the right watercolor paints.  I think I like the one on the left more; the one on the left is too dark but I just need to practice at making my watercolors lighter, i.e. with more water or less of the actual color.


I wound up using the pencil and chalk one, just because it's lighter and that's what I really wanted.

Oh and I made my own tags.  The ones that go behind the picture?  I didn't have those so I got some scraps, a circle punch, and a hole puncher. 


Next, my chevron paper was a bit too dark so I wanted to use vellum.  The problem with that was that I couldn't find my vellum.  But I did find some tracing paper that is acid free so I used that.  See the difference?


My finished layout.  The waves are cut from the CM Traveler cartridge, the polka dot card behind the photo is from one of the Project Life kits, the button is Studio Calico, binder clip is Fancy Pants, "hello" in the title is Simple Stores, and I cut "Paradise" from the Cricut using the Lyrical Letters cartridge (I did have to weld the letters together myself).  There's some yellow polka dot ribbon and some washi tape beneath that.  The sun is cut from the Traveler cartridge too.  The chevron paper is Simple Stories and the wave and title are cut from CTMH paper (Dotty For You). 

 
Add some sequins and some Prima Say It In Crystals.
 
 
I used the tracing paper for some little journaling accents here and there (just like Valerie's though my old-fashioned typewriter is put away in storage somewhere).
 

All done.  :)


So then I needed to use up my ovals.... I decided to paint those with watercolors, too, and once dry I stamped a CTMH sentiment on there.  A word to the wise:  Wait until your paper is COMPLETELY DRY before stamping.  See the sentiment on the bottom left oval, how it's blurry on one side and at the bottom?  That's because the paper was still semi-wet.  I thought it would be ok but I was wrong!  ;-)
 
 
I also watercolored some of the bigger ovals in brown to make a 3D frame for my sentiment.
 

Using a Darice embossing folder in the form of a cross, I embossed a sheet of white, used my handy dandy corner edger on the corners, inked all my card and card topper edges, added SU! satin ribbon in Chocolate Chip, and then my ovals, ending with some bling.  Card all done and I used up some of those ovals from my previous projects. 


Detail shot.  I did put the top turquoise oval onto pop dots for further dimension.


And that is the end of my (current) experimenting with watercolors.  I really loved using them and I plan to bring them out more often in the future. 

Thanks for stopping by and leaving love!

Saturday, August 31, 2013

Cardmaking :)

I've made a few more cards over the last week.  I've been enjoying working with my Big Shot and Cuttlebug machines. 

For this first one, after embossing the background with an Anna Griffin folder, I proceeded to use watercolors to outline some of the flowers, leaves, and, of course, the bird.  Then I used Stickles to make some of the elements pop.  CTMH ribbon, Big Shot die for the sentiment, which is a stamped CTMH sentiment. 


For this next card I used my favorite color. :) The background is embossed with a Darice embossing folder and the scalloped half-circle and butterflies are Spellbinders dies. I used Glimmer Mist paint for the edge around the perimeter of my background, as well as on the butterflies.


For the smaller butterflies I cut three and layered them, leaving the bottom one the plain purple, embossing the middle white one with a Cuttlebug folder, and then using the same Glimmer Mist paint on the top one, and then I only glued along the middle of each butterfly so the wings could be popped out. The swirls under the small butterflies are the cut-outs from the bigger butterfly's wings.  :)

 
The sentiment is CTMH, after I sprayed some lovely purple Glimmer Mist on the scalloped circle. Ribbon is SU! and bling is CTMH.


Next, I made this beauty.  I think it's my favorite of the bunch.  It came together VERY easily. 
 
 
The background is embossed with Cuttlebug's Swiss Dots (which is one of my go-to favorites in case you haven't noticed! :) ).  The note part is a SU!/Sizzix die, which I embossed with another Cuttlebug folder.  "Strong" and "Brilliant" are Simon Says Stamp dies.  The small "you are so" tag is just hand-cut, and it's a CTMH stamp.  Buttons are from stash and the jump ring too.  Stamps are CTMH. 


One little detail shot.  :)

I won't ever get tired of saying it:  STAMP THE INSIDE of your card!!!  :)

 
Finally, I brought out an older SU!/Sizzix die that I bought a few years ago but had never used.  This 3D pop-up card was actually easy to make and lots of fun to decorate!
 
This is the front of the card.  It looks simple BUT when you open it up....
 
 
TADA!  A 3D cake.  :)


I've used Simple Stories paper and stickers throughout, and the shine on the cake is from Stickles. 

Here are a couple of side shots. 


I really enjoyed making the above card.  Like I said, it came together very easily.  It may look complicated but it really wasn't; I think it took longer for the Stickles to dry than it took me to make the whole thing! 
 
Those are my card projects for this week.  Thank you for stopping by! 


Monday, August 12, 2013

One layout to share, plus some cards!

 
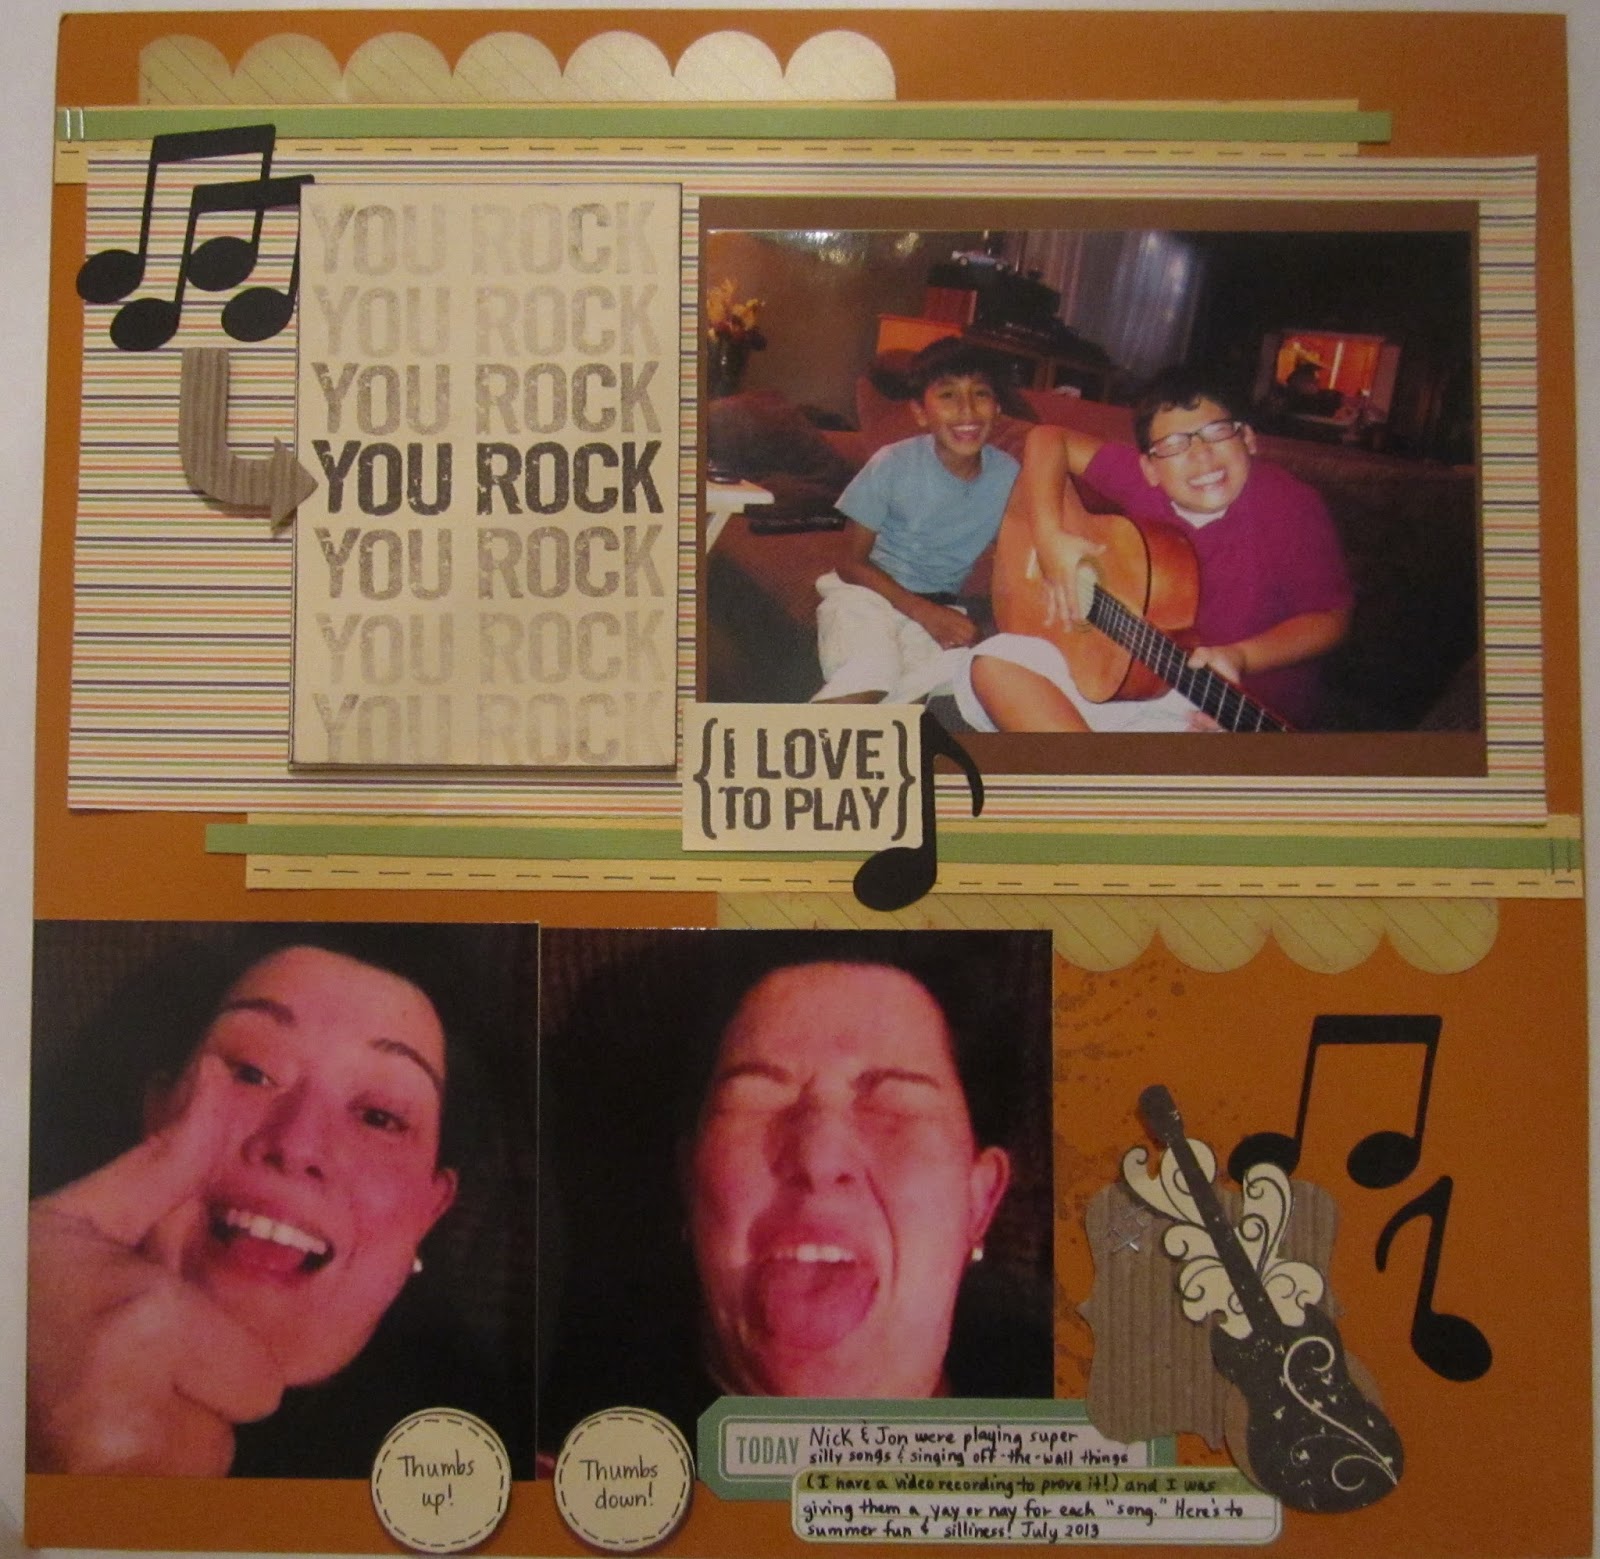
Here's a quick layout, made with my current favorite color, orange.  Nick and his friend were making up songs while Nick played his guitar.  I was sitting on the opposite couch and did these iPhone self-portraits... I never realized how fat my tongue is.  Ha ha!  The title, phrase, and guitar are stamped from an older CTMH set.  With the title I did stamp the middle one first and then worked my way up as the ink on the stamp faded, then fully inked my stamp, stamped it on scrap paper, and did the lighter shades back on my title, working down the second time.


I used some CTMH chipboard, too.  The music notes are Cuttlebug dies that I've had for *years*... glad I finally used them!


I had a few scraps leftover and I decided to use them ALL up.  I made a few cards.  All I needed was cardstock for the actual card.  I used a Sizzix folder to emboss the hearts on the yellow strip.  CTMH "Hugged" stamp. 


I used SU! punches for the circle and scallop circle.  Flowers are Prima, bling is CTMH, ribbon is SU! grosgrain.


Stamps are CTMH, ribbon is SU! on this next one.


Technique Tuesday "thank you" stamp, SU! grosgrain ribbon, CTMH twine.


SU! punch for the scallop border, Darice embossing folder on the green banner, CTMH stamp, SU! grosgrain ribbon. 

And what's left?  Not much...


Not bad for three sheets of patterned paper and three sheets of cardstock! (I had already used a good chunk of it on a previous two-page layout that's in one of my son's albums, in storage somewhere)

Thanks for stopping by and leaving love!  All comments welcome, even some constructive criticism if you have it.  :)

Blessings,
Martha