Showing posts with label Cricut. Show all posts

Wednesday, November 20, 2013

Don't have the right embellishment? Make your own!

This is why I LOVE my Cricut so much.  And one day I hope to LOVE a Silhouette Cameo, too.  :)

I really wanted to document this day at Six Flags with my second cousin and his family when they visited SA a year and a half ago, but I didn't have roller-coaster-themed paper, and Six Flags is the Warner Bros brand but I didn't have any Bugs Bunny paper either (the ride is called Bugs Bunny White Water Rapids).... so I made my own stuff!  The actual roller coaster title is cut from the Summer Celebrations Cricut cartridge; the shield, which mimics the name of the coaster on the picture, is from the Create A Critter cartridge; and all the flourishes are from the Cindy Loo cartridge.  Thickers complete my title.

 
Also, I should mention that I cut the shield, flourishes, and background of the coaster title from WHITE, and the big 8x8 piece of paper is white too.  On the big 8x8 paper I used a CTMH background stamp so it would match my background PP (which is Little Yellow Bicycle), and I used inks to ink up the other pieces of white.  Finally, I added Stickles to the flourishes to make them appear wet as the ride we were on was also very wet!  OMGoodness it was such fun!  But Nick vowed that he will never.again. ride any roller coaster.  Bummer for him! 


Word stickers are Simple Stories. 
 
Next, I posted a week or so ago about Nick's baseball season coming to an end and how just one two-page layout was going to cover the whole season.  What's funny about that is I hadn't scrapped LAST YEAR'S baseball pictures.... I just found them buried in a to-do stack!  And my handy dandy Cricut came to the rescue again.  The baseball mitt, though easily available in a variety of stickers at any craft store, is also on my Sports Mania cartridge so I just got the right paper and cut!  The baseball itself is from a sticker pack I bought long ago.  The background brown behind all of my pictures is cut from the Art Philosophy (CTMH) cartridge.  Thickers, Simple Stories stickers, and some chipboard complete my layout. 


Oh and that's yet another Wal-Mart gift card that I used.  :D
Background PP is Bo Bunny. 


Thanks for stopping by and leaving love!
 
Blessings,
Martha
 

Saturday, September 14, 2013

As promised!

As promised, here are the layouts I made over the last couple of days, all ready to share!
 
 For this first LO, I have some pictures of Nick catching a chicken.  That's right, a chicken.  No, we don't live out in the country, we live on the south side of a fairly large city... and on this side of town the messicans (myself and my parents included!) can grow chickens if we wanna!  LOL  So one of the neighbor's chickens got out and Nick thought he found himself a new pet.  Not!!!  :)
 
I used Cricut Noah's ABC Animals to cut out the "Chicken" and "catching", and I used the Animal Kingdom cartridge for the actual chicken.  There were a few layers for the chicken, except for the feet.  I used Copics to color in his feet/claws. 
 
 
I don't know why I decided I wanted white for my title but, as usual, once it was cut out it was just TOO white for me.  So I did some shading.  First, I shaded the entire white piece with CTMH's Bamboo ink (it's a nice light beige).  On the following picture you can see where the left half is still white and the right is shaded. 
 
 
After that I added some yellow color (CTMH's Crème Brulee) to the bottom half.
 
 
And after I finished that, I added Cranberry at the very bottom.  It has very nice depth now, and really pops on the black shadow piece.  :)
 
 
Here's the finished layout, featuring Basic Grey's 2010 line called Hello Luscious.  ("cluck" is also cut from Noah's ABC Animals).  Chipboard from stash and journaling on a CTMH stamp. I drew lines around the perimeter of the big PP piece, just so it looks more grounded and less lonely.  ;)


 Love that little chicken!  I used Copics to color in the feathers and wing, and I drew the eyes myself.  I have googly eyes that I could have used, but I didn't want my chicken to look like he was really high on some drugs.  LOLOLOL!  So drawing them in was the way to go. 


Next, this is a simple LO where I just used both sides of three patterned papers to cut my own banners.  Add a cardstock mat, some SU! grosgrain ribbon, bling, and stickers and it's done.  It's not the greatest picture but I'm trying to shy away from posed pictures and get more candid shots. 
 
 
Journaling is on a Cricut cut, from CTMH's Art Philosophy cartridge. I had that piece just lying around as it was extra from some other project. 
 
 
Finally, I have these silly pictures of Nick pretending to have a moustache.  OMGosh do we have fun with fake moustaches in this house!  As soon as Nick fashions himself one I tell him that I moustache him a question, and he answers with "I'll shave it for you later."  My sisters howls with laughter at our silliness, and we follow suit.  Good times, good times!!!  :D Anywho!  I believe this is Crate Paper patterned paper and cardstock from the stash.  The moustaches on the left there?  That was manila paper that was too stark after I embossed the stamped moustaches, so I dabbed brown on the whole piece of paper.  The moustache in the title is from Hobby Lobby's Paper studio, and the rest of the title is CTMH letter stickers. 


So here are the moustaches I was just talking about.  That is actually a CTMH stamp that I stamped with VersaMark ink and embossed in black.  As the powder melted and became glossy and shiny and wonderful, the moustache took on new meaning for me...


Here's the stamp set for the moustache.  It can be cut out with the CTMH Artiste cartridge, and it's meant to be a part of a Father's day set. 
 
 
So, as I was saying, as that moustache was getting all purdied up (LOL) I saw it as more than a moustache.  It looked like two birdies kissing!  So I broke out my leftover Chantilly (CTMH) paper from a while back, stamped with more VersaMark, and embossed with white. 
 
 
Meet two little love birds.  :)  Now, maybe you have to cross your eyes a little bit to see the two birds (which I did outline with a CTMH Cranberry alcohol marker, and used the same to draw in little legs for my love birds, too!), and when you uncross your eyes you may see a moustache that has two googly eyes on it.  It's kind of funny IRL!  :D
 
 
I used the Artbooking cartridge to cut that hot pink heart ribbon on the front, and also to cut out "Love", which I glued on the inside of the card.  I then used an alphabet set to stamp "YOU". 
 
This is the alpha set for the inside-- I really need to use it more!!!
 
 
All right crafty friends, that is all for now.  I haven't made anything today and tomorrow we have two baseball games... and while I have your attention can I just vent a bit?  There's one game at 10 am and another at 4 pm.  We will not be able to make it to church.  In fact, we won't get much of anything done tomorrow or get any rest for the week to come, with two spread out games like that.  Can you say annoying?!!!!  GRRRR 
 
OK, vent over.  Back to crafting!  Be sure to leave me some love and visit often.
 
Blessings,
 
Martha
 

Friday, September 6, 2013

Did I ever...

...share these cards?  I certainly meant to!

This card features an embossing folder by Tim Holtz.  The hardware is CTMH (no longer available).  The peacock is cut from Cricut's French Manor cartridge, which I applied Glimmer Mist to, and the bling (the peacock's eye) is Prima.


You can see where I attempted to pop out some of the peacock's feathers.  It looks super cool IRL.


For this next one I cut the bird from French Manor as well, and the tan frame is from one of the CTMH Cricut cartridges.  I embossed with Cuttlebug folders, and I did add some bronze Glimmer Mist to the bird.  I was going to add a sentiment but I really like it this plain. 

 
That is my card share for today.  Have a great weekend!

Monday, September 2, 2013

Working with watercolors (by me)

LOL-- I say working with watercolors "by me" in my title because this layout is a complete, total, 100% scraplift from my friend Valerie.  Here's a link to her blog with the layout I copied errr was inspired by:  Valerie B's BLOG!

First, I had to make the oval paper on my Gypsy for cutting on my Cricut: 


(I'm saving all of those ovals for later....)

I didn't have watercolor paints when I first set out to copy Valerie's layout so I used water color pencils and some shimmery chalks (Pebbles Inc brand).

 
Here's what it looked like when done. You can tell by the pencil/coloring marks which ovals are colored in with the pencils and the other ones without those lines were shaded in with chalks. 
 

Then I got me some watercolors.  :)  I cut the ovals out once again so I could compare the two different mediums side by side. 


On the left is watercolor pencils and shimmer chalks, on the right watercolor paints.  I think I like the one on the left more; the one on the left is too dark but I just need to practice at making my watercolors lighter, i.e. with more water or less of the actual color.


I wound up using the pencil and chalk one, just because it's lighter and that's what I really wanted.

Oh and I made my own tags.  The ones that go behind the picture?  I didn't have those so I got some scraps, a circle punch, and a hole puncher. 


Next, my chevron paper was a bit too dark so I wanted to use vellum.  The problem with that was that I couldn't find my vellum.  But I did find some tracing paper that is acid free so I used that.  See the difference?


My finished layout.  The waves are cut from the CM Traveler cartridge, the polka dot card behind the photo is from one of the Project Life kits, the button is Studio Calico, binder clip is Fancy Pants, "hello" in the title is Simple Stores, and I cut "Paradise" from the Cricut using the Lyrical Letters cartridge (I did have to weld the letters together myself).  There's some yellow polka dot ribbon and some washi tape beneath that.  The sun is cut from the Traveler cartridge too.  The chevron paper is Simple Stories and the wave and title are cut from CTMH paper (Dotty For You). 

 
Add some sequins and some Prima Say It In Crystals.
 
 
I used the tracing paper for some little journaling accents here and there (just like Valerie's though my old-fashioned typewriter is put away in storage somewhere).
 

All done.  :)


So then I needed to use up my ovals.... I decided to paint those with watercolors, too, and once dry I stamped a CTMH sentiment on there.  A word to the wise:  Wait until your paper is COMPLETELY DRY before stamping.  See the sentiment on the bottom left oval, how it's blurry on one side and at the bottom?  That's because the paper was still semi-wet.  I thought it would be ok but I was wrong!  ;-)
 
 
I also watercolored some of the bigger ovals in brown to make a 3D frame for my sentiment.
 

Using a Darice embossing folder in the form of a cross, I embossed a sheet of white, used my handy dandy corner edger on the corners, inked all my card and card topper edges, added SU! satin ribbon in Chocolate Chip, and then my ovals, ending with some bling.  Card all done and I used up some of those ovals from my previous projects. 


Detail shot.  I did put the top turquoise oval onto pop dots for further dimension.


And that is the end of my (current) experimenting with watercolors.  I really loved using them and I plan to bring them out more often in the future. 

Thanks for stopping by and leaving love!

Sunday, August 25, 2013

Another LO share!

Sometimes it's ok to just put a few pictures down on a pretty patterned paper, add a few accents, and journal.  No techniques, no fuss, just another story told in your scrapbook.  It's OK to be simple!

 
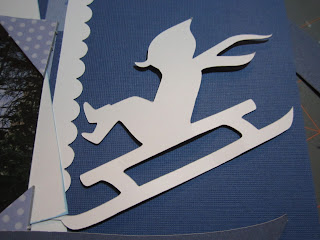
Sometimes you're ready to glue everything down and you go HMMM.... maybe I should.... make that POP a little bit.  :)  The sledding kid die cut (from Cricut's Snow Day) is plain white and it was just too plain.  My title?  Too plain as well. 


The Cricut cut has layers I could have added, but I really just wanted a sort of shadow here.  So, how to fix it up without making it too cluttered and messy looking?


Glimmer Mist, one of the chalkboard colors, on both the cut piece and my cut out title will do the trick!  (Title from Robotz cartridge, and banner is from the Jubilee cartridge.) Oh, and a little bit of bling here and there for added dimension and sparkle:


That's what I'm talkin' 'bout.  :D

 (click to enlarge)

Add pop dots to the title for an extra pop. 

I guess I'm sick of summer because at Friday night's crop all I did were winter photos. We don't have a "real" winter here in SA; my sister has taken my kiddo to Ruidoso, New Mexico, for two years in a row, all for the purpose of playing in the snow.  My siblings and I grew up in Chicago and we knew playing in the snow.  In fact, I remember walking to school when the dang snow was taller than me!  :)


This journaling tag is from a swap I participated in years ago.  And I mean YEARS ago.  I have no idea who made it.  I'm just glad I finally found a permanent home for that cutie snow man. 


Last summer Nick's best friend had his b-day party at an ice skating rink.  Who cares about birthday papers and accents when you can go with more winter-y accents?!!  :)


On the above LO, I used a SU! scallop punch for those blue edges.  The die cut title is from a Cricut cartridge; I didn't write down which one and I don't remember... The "Thaddaeus" banner is hand cut and the stamps are an old CTMH set.  The mittens and all felt accents on all of the above LOs are KI Memories brand, also years and years old. 
 
So, after making about seven winter-themed layouts some summer pictures caught my fancy and I got to work on those.  I could never, ever, EVER be a chronological scrapbooker.  I go with whatever pictures or paper calls my name! 
 
The PP is Little Yellow Bicycle that I believe it is their line from last summer.  I'm still using up the stash here!  "Pool Party" was cut from either the H2O Cricut cartridge or the Splish Splash cart, I don't remember which one.  The word bubbles on the right-sided page are from the CTMH Artiste cartridge.  I added some buttons in the sun die cut (all the plastic die cuts are LYB brand), and the "happy happy" is an accent I made myself a month or two ago. 
 

The journaling block is from Becky Higgin's Project Life.  I just cut it down to fit, added some brands and twine and mounted it on the green that's recurrent throughout my two-pager. 


Finally, here's a two-pager that I made last week some time.  My sister bought Nick a chemistry set and-- be still my beating heart as I minored in Chemistry in college-- Nick LOVED experimenting!  I love, love, love that he loves to learn!  Especially if it's in the science field!!! 


The flask and test tubes are cut from Cricut's Chemistry Icon digital images.  I had fun choosing which colors to use on that.  "Kaboom" is from the Cricut Disney font and the "boom" icon it's mounted on is from the Office Help cartridge.  The PP and die cuts are Jillibean Soup's Atomic Soup, which I believe is a paper line that's either one or two years old. 

 
Would ya look at that face?  What's not to love!  :) :) :)
 
Thanks for stopping by and leaving love!  I hope everyone has a fantastic week!